
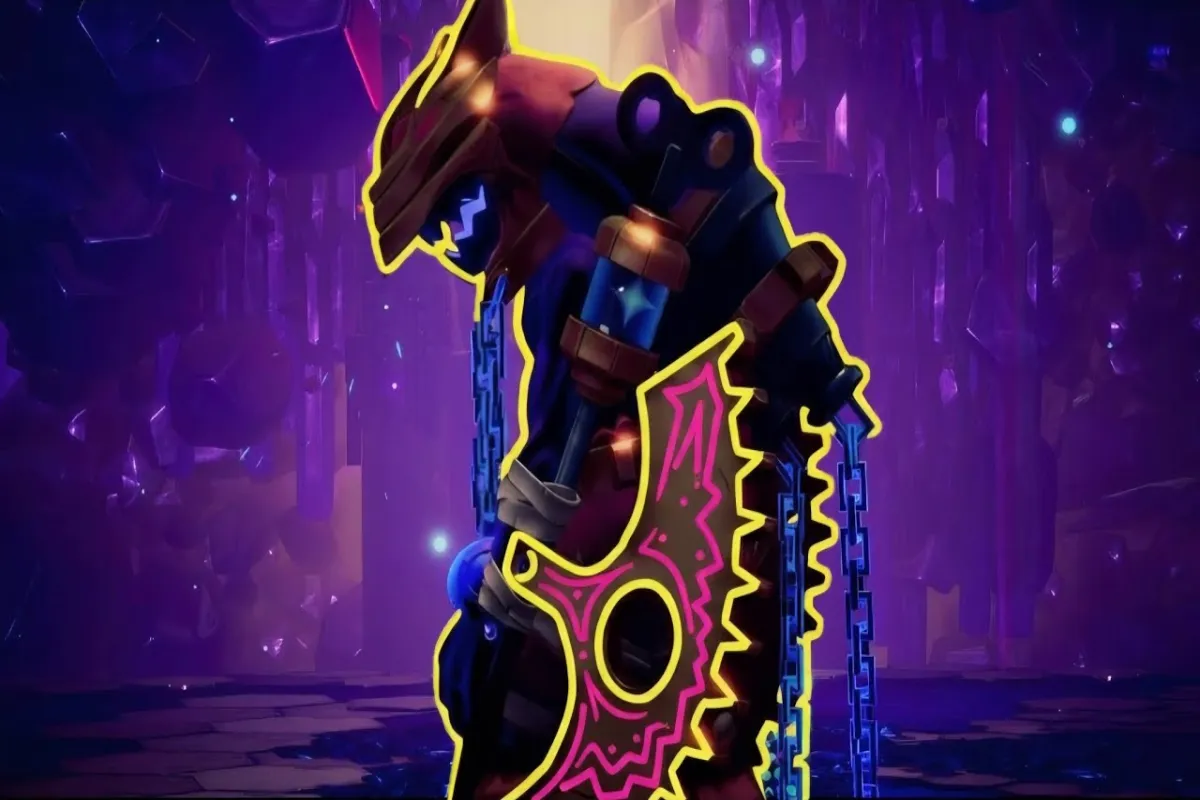
The Duskfade combat system explained in this guide pulls from official previews, the PlayStation Blog feature, and community testing on the August 2026 launch build. Every parry, dodge, and combo feeds into the same time-stop meter that doubles as the world's clock, so the system rewards players who learn how each input reshapes the timing curve rather than players who mash buttons.
How Duskfade's Combat System Is Built
Weird Beluga S.L. shipped this 3D action-platformer on August 13, 2026 across PC, PS5, Xbox Series X|S, and Nintendo Switch 2 with buy-to-play pricing and no microtransactions, and the Duskfade on Steam store page lists the combat system as a blend of Kingdom Hearts-style combo pressure and Sekiro-style posture breaks. The official PlayStation Blog feature on Duskfade confirms that the combat layer is built on Unreal Engine 5's motion-warping tools, which is why every dodge, parry, and combo pull warps the world clock by a fraction of a second.
The combat loop rests on four pillars that all share one stamina meter:
| Pillar | What It Controls | Default Input |
|---|---|---|
| Light Attack | Builds combo meter | Square / X |
| Heavy Attack | Breaks enemy guard | Triangle / Y |
| Parry | Counters incoming telegraphs | L1 (timed) |
| Dodge Roll | Triggers time-stop pause | Circle / B |
Each pillar feeds the next, so a successful parry chains into a heavy attack that finishes with a dodge roll to reposition. Because the dodge roll triggers a brief world pause via the Sword Clock Hand mechanic, combat feels closer to a rhythm game than a button masher, and reading each input's effect on the timing curve is the difference between wiping on the first boss and clearing the whole game. If you want deeper coverage on individual keybinds, the Duskfade combat mechanics guide breaks down every input separately.
The Parry Mechanic — How Duskfade Parry Works
The most common question new players ask is how the parry works in Duskfade, because the timing window is shorter than in most Souls-likes and the reward is dramatically larger. Duskfade parry in Duskfade rewards a precise input during the last 6 frames of an incoming attack — roughly 0.1 seconds at 60 fps — and landing it freezes the enemy's animation, refunds a chunk of stamina, and opens a guaranteed counter combo window. As of the August 2026 launch build, community testing on Reddit and the Steam forums confirms that the window actually widens against heavier enemies, which is the opposite of what most players expect and is documented across the parry-timing threads.
Parry Timing Windows
| Enemy Tier | Parry Window (frames) | Stamina Refund | Counter Damage |
|---|---|---|---|
| Grunt | 6 | 20% | 1.5x |
| Heavy Brute | 8 | 25% | 2.0x |
| Mid-Boss | 5 | 30% | 2.5x |
| World Boss | 4 | 40% | 3.0x |
Heavier enemies give you a wider window because their attack wind-ups are longer, which means a careful player who waits for the audio cue can parry even the toughest boss without frame-perfect input. Parrying against a world boss also pauses world time for 0.8 seconds, which lets you walk behind the boss, reposition, or queue up a heavy attack that otherwise would not connect. Players have nicknamed this the tick trick because the pause frames look like the second hand stuttering on a stopped clock, and the Duskfade combat tips advanced breakdown covers the setups in more detail.
Reading Telegraphs
Every enemy telegraphs attacks through three signals that you learn to combine into muscle memory within the first few hours. The first signal is the color flash on the enemy's weapon: red means the attack is unblockable, blue means it is parryable, and yellow means you should block instead of parrying. The second signal is the posture break — heavy enemies lean forward and shift weight to their back foot before a charged swing, which gives you roughly 0.4 seconds of pre-attack warning.
The third signal is the audio cue, which triggers about 0.3 seconds before impact and carries a unique sting for each attack type. Because the audio sting fires earlier than the visual flash, players on lower-latency monitors can effectively extend their parry window by listening rather than watching. Combining the color flash with the audio cue is what separates a parry that consistently refunds stamina from one that drains 15 stamina on a miss, which is why the developer recommends audio cues over visual ones for high-level play.
Stamina, Posture, and Timing Windows
Stamina is the backbone of every encounter, because stamina in Duskfade drives attacks, dodges, blocks, and the time-stop meter simultaneously. Running out means the world unfreezes, your parry window collapses, and the boss closes the gap before you recover. Based on community testing after launch, the stamina curve is tuned tighter than in similar action-platformers, so resource management matters more than raw damage output in long fights.
Stamina Refund and the Time-Stop Link
| Action | Base Cost | Refund Source |
|---|---|---|
| Light Attack | 5 | +2 per hit in chains of 3+ |
| Heavy Attack | 12 | Parry → Heavy chains refund 4 |
| Dodge Roll | 8 | Full-meter trigger refunds 10 |
| Block | 3/sec | N/A (steady drain) |
| Parry Attempt (miss) | 15 | N/A (purely punitive) |
Notice that a missed parry costs more than two heavy attacks, which is why the Duskfade combat tips beginner guide advises new players to default to dodge-rolling until they have memorized each boss's rhythm. The dodge roll is also the only move that triggers the world time-stop when executed at a full meter, which means spamming dodge to refill stamina is usually a better early-game strategy than committing to risky parry attempts against unknown enemies.
Posture Break Mechanics
Posture is the hidden second meter that determines stagger, and every fight is a posture war as much as a health war. Every blocked hit raises posture by 8%, every parried hit by 18%, and successful dodge timing reduces posture by 4% per second. When posture hits 100%, the enemy is stunned for 1.5 seconds and takes 2x damage from the next combo finisher, which is the main way the game rewards defensive play.
Because posture decays naturally over time, you want to apply pressure in short bursts rather than holding block forever, because an enemy that recovers posture mid-fight will punish you for over-committing. Bosses regenerate posture 50% faster than grunts, which is why most boss fights reward the parry → heavy punishes far more than extended light-attack chains. The posture system is one of the most under-documented layers of the Duskfade combat system explained in previews, because most players only notice it after their first failed stagger attempt.
Combo Chains and Enemy Telegraphs
Combos turn raw inputs into screen-clearing finishers, and the combo system ties directly into the time-stop mechanic in ways that change how you queue inputs. Every third hit in a chain extends the world pause by 0.2 seconds, which lets you read the enemy's recovery animation and decide whether to keep swinging or back off. Because the world is paused while you queue your next input, you can pre-load a heavy attack that lands the moment time resumes, which is what makes high-level combos feel pre-cognitive rather than reactive.
Starter Combo Strings
| Combo Name | Input Sequence | Damage | Stamina Net |
|---|---|---|---|
| Triple Tap | Light, Light, Heavy | 180 | -4 (refunded) |
| Punish Spiral | Parry → Heavy → Light → Heavy | 420 | +12 (parry refund) |
| Time Slice | Dodge → Heavy → Light → Heavy → Dodge | 510 | -16 |
| Aerial Finish | Launch → Light, Light, Heavy (air) | 350 | -8 |
Triple Tap is the safest bread-and-butter chain because every third hit refunds stamina, and most players settle into this string by the end of the first world. Punish Spiral is what you build every parry around because it deals the highest damage per stamina spent in any tier, and the parry refund actually pushes your stamina into the positive. Time Slice is the hardest combo in the early game because it requires landing both dodges at the edge of the time-stop window, but it also deals the highest single-burst damage of any non-ultimate string.
Enemy telegraphs fall into two broad categories, and recognizing them is what unlocks the combo layer. Fast enemies wind up over 0.2 seconds and rely on volume of attacks, which means you counter them with Triple Tap chains and short dodges. Heavy enemies telegraph over 0.6 seconds but hit twice as hard, which means you wait for the parry window and convert it into a Punish Spiral. Mixing light combos against fast enemies and parry punishes against heavies is the default rhythm most players settle into by hour five of the campaign.
Boss Encounters and Combat Roles
Boss fights are where the combat system stops feeling forgiving and starts rewarding players who actually understand the underlying timing. Every boss has three phases, and each phase introduces a new attack pattern that re-tests your parry timing under tighter conditions. The first phase usually teaches you the parry window against a single pattern, the second phase adds a second enemy or a new movement rule, and the third phase combines both under a reduced stamina cap that punishes greedy play.
Combat Roles in Boss Fights
| Boss Name | Phase 1 Mechanic | Phase 2 Add-On | Phase 3 Punish |
|---|---|---|---|
| The Hollow Cartographer | Single slash combo | Minion summons | Time-stop counter required |
| Brass Bellkeeper | Charge + slam | Two-tone bell ring | Stamina drain field |
| Crimson Warden | Parryable thrust | Spinning blades | Unblockable finisher |
| Forgotten Horologist | Mixed light/heavy | Time-stop denial | Combo cap of 2 hits |
The Crimson Warden is widely considered the parry benchmark because every attack is parryable but the window shrinks from 6 frames to 4 between phase 1 and phase 3, which is roughly a 33% reduction in available reaction time. Players who cannot hold a 4-frame parry under pressure need to lean on dodge rolls and posture breaks instead, because mistimed parries against the Crimson Warden cost more stamina than any other boss in the game.
The game also supports a combat role system that lets you tag between aggressive, balanced, and defensive loadouts on the fly. The aggressive role buffs damage by 20% but cuts parry window by 1 frame, while the defensive role widens the parry window by 2 frames but reduces combo damage by 25%. Most players settle on the balanced role for normal encounters and switch to defensive only when fighting bosses with 4-frame windows, which keeps the Duskfade combat system explained loop flexible without forcing a hard specialization. For a complete walkthrough of how every system interacts, the Duskfade combat guide ties the parry, stamina, and combo layers into a single reference.
Frequently Asked Questions
What is the Duskfade parry input?
Press L1 (or the equivalent shoulder button on each platform) roughly 0.1 seconds before an enemy attack lands. The window is signaled by a blue color flash on the enemy's weapon and a unique audio sting that triggers about 0.3 seconds before impact, and landing it refunds stamina while pausing the world for 0.8 seconds.
How does the parry work in Duskfade for beginners?
Start by dodge-rolling instead of parrying, then practice against the early grunts in the Sunken Chapel. Their attack wind-up is the longest in the game at 0.6 seconds, which gives you a forgiving 8-frame parry window to learn the timing before you move on to bosses with 4-frame windows.
Does parrying refund stamina in Duskfade?
Yes, a successful parry refunds between 20% and 40% of your stamina bar depending on the enemy tier, and the refund scales upward against heavier enemies. World boss parries also refund 40% and pause world time for 0.8 seconds via the Sword Clock Hand mechanic, which is the core reward loop the Duskfade combat system explained above is built around.
Can you combo after a parry?
Every successful parry opens a guaranteed counter combo window, and the Punish Spiral (parry → heavy → light → heavy) is the most efficient string, dealing 420 damage at a net stamina gain of +12. This is one of the main reasons the parry is worth practicing even though a missed attempt costs 15 stamina.
Which boss teaches the parry timing best?
The Hollow Cartographer in the first world is the best tutorial boss because its first-phase attacks all carry an 8-frame parry window, and the community uses this encounter to benchmark controller latency before tackling later bosses. After clearing this fight, most players can carry the timing muscle memory into the Crimson Warden and the Forgotten Horologist encounters without restarting from scratch.